Photoshop Friday | Rhode Island Newborn Photography
I have done this before but it’s been a while! There are SO many actions out there for people to use when playing with pictures nowadays, I feel like it is almost going overboard with what is available. I will admit I TOTALLY played with actions when I first started!! And there is nothing wrong with playing with them especially when you are learning editing or just having fun. But good, clean post-processing is really what you should be going for. Get a really good grip on that and then play. Don’t slap an action (or five) on a photo that is “eh” and think that is editing and call it a day 😉 I am going to share a before and after with you on one of my recent newborn shots to take you through how I post-process a photo.
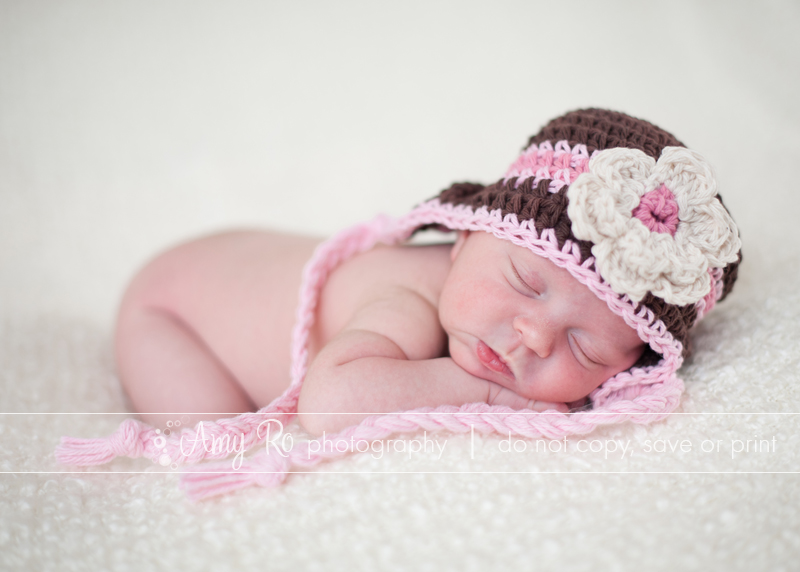
First we have the straight out of camera shoot (SOOC). This was shot with my d700 with the 50mm 1.4g lens. Settings were ISO 200, f/1.8, 1/640. For lighting there was a window camera right and one camera left. She was placed at a 45 degree angle to the light that was coming in. I intentionally slightly underexpose the baby when I am shooting on the cream blanket because I know it is easier to bring up the exposure on the skin then to try and fix a blown white in the blanket. At the same time my goal is to try to expose both as equally as I possibly can. I don’t want to have to drastically edit! As you can see though, this is really not bad for SOOC. I would have no problem showing this to a client right as it is, before any edits were done. That should be your goal. Always.

(Side note here, she was a bit red because we had the house warm and I had the space heater on as well and I had her laying on her side for previous shots. If she was normally just a pink / red baby I wouldn’t worry about the red too much.)
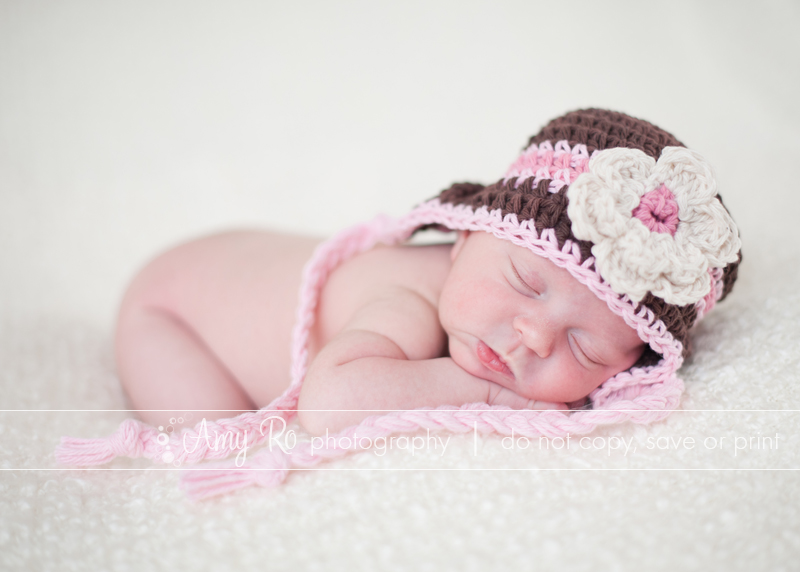
The first thing I do is open the image in Adobe Camera RAW. (I don’t use Lightroom. I don’t understand Lightroom. When I did try to use and understand it I discovered I really don’t like Lightroom. So don’t ask me what to do with lightroom. 😉 Bridge and Photoshop are my true loves and I am faithful to them.) Anywho. Back to this. The only changes I will make in ACR: increase exposure by .25, slide recovery slider to +10 to recover any details in that blanket that may have been slightly blown when I increased the exposure and bring blacks down to +3. Outside of that main window the only other change, because she was rather red as stated previously, is on the luminance tab I increased the luminance of reds to +20. Here is what it looks like now:

Then I open in Photoshop. I discovered after a few years of playing that there were certain steps I ALWAYS took to edit a photo. I really like clean edits. I don’t like a lot of actions. I don’t like when people/scenes look fake or plasticky or wonky colored. Yes, sometimes I will go for a different processed look *if I think the image calls for it* but regularly, no. I have very clean edits. I want the end product 97% of the time to be as if you are looking through a window at someone. But back to what I was saying. I discovered there were things I always did. So I made my OWN action that used all of these steps. (By the way people always ask me for specifically what exactly my workflow action is – it makes no sense to tell you because what works for me will not work for you. Discover your true editing style and go from there!)
For newborns, after running portraiture on a duplicate layer, lowering the opacity to 30% and erasing back all details, I run that action. For ME, that involves:
- a levels layer to bring depth to tones
- a slight add of contrast and a tiny pinch of saturation
- a slight vignette on the outer edge of the photo (NOT black or white but a simple darkening of the colors that are there to draw the eye inwards towards the lighter parts)
- An unsharp mask
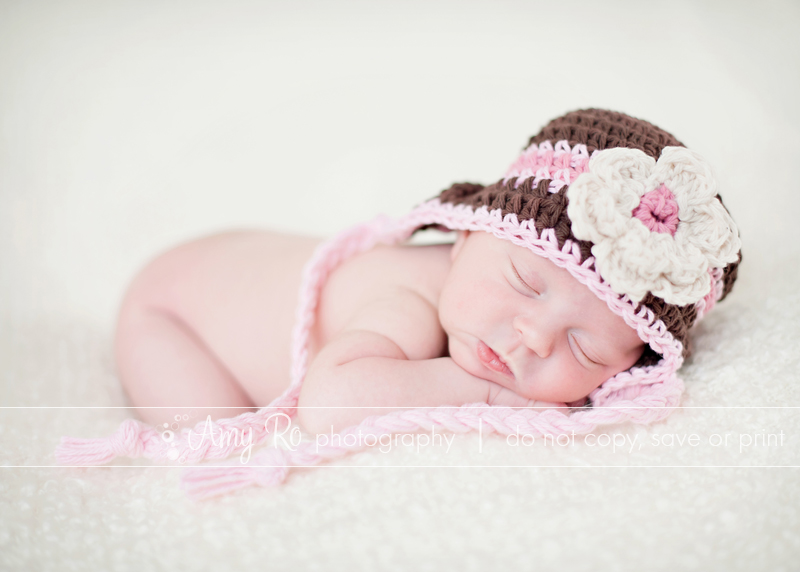
Once I have run my workflow action, it is left unflattened and I go back in and erase back anything that has been adversely affected by the edits. Blown whites or other colors, etc. Once I did that for this image I still needed to pull out some red using a selective color layer and then did a color balance layer to add some yellow because it was a bit cool. I also spot edited out a few small flakes of skin and the slight stork’s bite on her eyelid. And this is my finished product:
This entire edit from beginning to end takes about two minutes. That’s it. The really important thing to realize though is that I started off with a really decent (in my humble opinion LOL!) straight out of the camera shot. You should never have to *fix* photos in photoshop or whatever program you use (except obvious things like cloning out wrinkles or a random spot). You should only be enhancing what is already there.

I do believe you are my Photoshop sister, lol. I have roughly the same steps, although my finished product isn’t as gorgeous as yours. It’s nice to know I’m on the right track! Thanks for the luminance tip, I’ll have to give that a try!
What a great post, Amy! I always love to see other photogs edits and I love that your editing is ‘clean’. I’ve been crazy with the actions in the past and am working more towards a clean edit attitude as well. Thanks for a great peek into your wonderful work!
Hi, I like your post! I’m new to this but also have a strong preference to clean edits when I’m looking at other people’s work. I just had my first newborn shoot the other day and am not sure where to start with the editing. I’ve heard the buzz word portraiture… is it an action that people are buying?