You guys heard of that book – Love in the Time of Cholera?

Yup.  Although nothing similar to that story, that title sure feels like where we are right now.  A crazy worldwide pandemic that has basically stopped the world in its tracks.  Everyone staying home and staying safe to help contain the spread of anything further than it has already gone.  One thing that can’t stop, though?  Babies being born and children growing up.  But what CAN’T and ISN’T happening right now for the foreseeable future are the photography sessions capturing those moments.  In this series of posts here on the blog I am going to share with you some tips and tricks to help you photograph your own babies during this time.  Today I am talking about how to Photograph your own Fresh 48 sessions – the newest of the new!  For my post on Newborn Sessions click HERE and for my post on Baby’s First Year Milestone Sessions click HERE

Please realize as with learning anything else, your photos will not look like mine in the end.  I have been doing this for 13 years and have different equipment, knowledge, editing programs, etc.  HOWEVER, no one is able to get professional photos done at this point so ANY are better than none!!  I talk in my class that I teach how important it is to not miss the moments no matter your skill or knowledge level.  And these moments?  They’re definitely big ones.

How to photograph your Fresh 48 Session
the very beginning

Fresh 48 Session

Fresh 48 Sessions are those sessions done right after having the baby in the hospital.  Named Fresh 48 because normally they occur in the first 48 hours after birth.  These days I know some hospitals are trying to release patients earlier than that to get them home BUT these are photos that shouldn’t be skipped if you can help it / feel up to it.  There are so many tiny details in those first few hours that will never ever be the same.  Don’t miss out on them!  Below are my suggestions for how to photograph your Fresh 48 session.

Packing List

If you plan to take hospital photos of your newborn, there are a few extra things you will want to pack in your hospital bag:

  • A camera  – This seems obvious and most people do this anyway.  If you don’t have one, your phone can work in a pinch.
  • Batteries and Memory Card for Camera – again seems obvious but you’d be surprised what you’ll forget in the race to get out of the house!
  • A white onesie – sometimes hospitals provide this.  But bring one just in case.  It makes a great simple outfit that allows their precious little details to shine through
  • Your own swaddle blanket – if you want something other than the hospital blanket (which, personally, I love).  This serves dual purpose as it can be a swaddle for the baby or be wrapped around the pad in the bassinet for a different backdrop for the baby to lay on (and works great with the white onesie!)
  • Outfit for you – if you want something other than your hospital gown.  I strongly recommend solid neutral colors.  A robe or pajama set
  • Name / letter board or Hello My Name Is ___ Sticker – totally extra but a cute touch if you have the time and desire to use it.  Name boards can be found on Etsy or even Michaels (curbside pick up!)
Time

Let me put on my OBGYN wife hat for a moment here and stress this.  When you can get up and move safely is when to photograph your baby.  That is the most important.  If you have a c-section you are going to likely going to want to wait a while or, better yet, show your spouse / partner these instructions and have them do it.  You also have extended time before you are discharged so take advantage if needed. If you are still bleeding heavily or are a fall risk, please don’t attempt this.  When everything is good and you are healthy and baby is healthy, then proceed

It is best if they have just eaten.  We all know what a hot mess nursing can be in the beginning especially for first time moms.  If you are breastfeeding, give yourself some grace and do the best you can.  Try and get some food into them before attempting to photograph them.  The bonus of brand new ones is that they do not smell you and associate you with food like they will in just a few short days.  If you are circumcising your baby it is best to do it after when they are still kind of dopey on the medicine.  Try not to do it before because you will not be able to feed them and they can be cranky.

I like to photograph the babies between 10 and 11 in the morning.  Usually morning rounds are done by then but it’s not going to be interrupted by lunch.  And light is good because the sun is higher in the sky.

Set Up

Before you get started you have to prep your space.  Now please note this does not mean you clean the room – that is what your spouse / partner is for!  Okay seriously, you don’t need to pick up everything and put it away but you do need room to work.  This will vary depending on the size of your room and how much stuff you have.  I have been in teeny rooms and I have been in massive suites.  Do your best.  Keep the area around one window clear.  And when all else fails, just try not to photograph the direction that all the junk is in.  Try and just pull the sheets over your bed if you intend to use that at all.  Don’t forget, when all is said and done, you ARE in a hospital room so it’s really okay if it looks like a hospital room :). Move the bassinet close to the window at a 45 to 90 degree angle.  I aim for 45.  When you lay the baby in there you want their head closest to the light and the light flowing down their body, not their feet closest and the light going up their nose.

Light

Once your space is prepped, and this sounds contrary to common sense, TURN OFF ALL THE LIGHTS IN THE ROOM.  I always make the joke at my sessions that kids have to be careful because we don’t want to end up at the hospital because hospitals have terrible lighting.  You guys.  It’s true.  Terrible, horrible, no good, very bad lighting (yes even the super bright spotlight they use for delivery).  At least for photos.  If you are in a windowless room, obviously don’t turn them all off.  For everyone else, though, off they go.  Open the shades in the room all the way on every window.  This is going to be your source of light.  That way you don’t have odd orange or yellow casts or weird shadows from overhead lighting going on.  Don’t forget to close the door to the room as well!  If it is super bright sun, wait until later in the day or until it is cloudy for best images.

Photograph the baby with your back to the light – but don’t block it!  That is no good.  You have to be aware of where you are and where shadows are.  And that is what is great about the bassinet – they roll so you can move them easily.  You can also shoot into the light so you – baby – window but just realize the look in the end will be different.  When you are doing detail shots – like feet or toes or fingers angle the bassinet as close to that light as you can!

Details

There are so many fun details you can get in the hospital room.  I suggest starting with the baby in the bassinet swaddled, then unwrap the baby and go from there to detail shots in the bassinet or on the bed, and then to images with each parent if you have someone to photograph you.  If not, selfie away!!!  In my class I always teach don’t miss the moments because they won’t happen again.  Two of my favorite images from my third child’s birth were selfies I took with my phone.  And I always ALWAYS urge mom to get in the photos.  We are SO HARD on ourselves because we have all seen the photos where mom is perfectly made up hair done with a newborn.  Yeah…guys, that’s like 2% of the time.  Don’t miss these photos.  It’s literally a one time shot with your baby.  It is completely fine to take five minutes to apply lip gloss or concealer or something, but GET IN THE IMAGE. I promise you a million times over, you will never ever regret it.

When you are photographing the baby, make sure you are not looking up his / her nose.  If you can see up their nostrils you are too far down.  Move yourself to that you’re slightly above.  That being said, don’t move TOO far over and have their forehead staring you in the face, either.  Don’t be afraid to move all around!  Take images from different angles (watching your light at all times) – you’ll be amazed at how different it can look.  Be in front, overhead, close, etc.

Specific Image Ideas:

  • Full baby in the bassinet – overhead or from the side but all of their body in the bassinet
  • In the hospital hat (so cute!!)
  • Profile from above or through the bassinet
  • Swaddled with the hospital hat on (have the nurses do it if you can’t manage – they’re magic)
  • The ankle or wrist bracelets
  • Wrinkly and flaky hands and toes.  Take off the socks or gloves for just a few minutes, it’s worth it
  • Umbilical clamp – depending on how you feel about it.  To me it shows just how brand new they are.
  • The name card in the bassinet
  • Parents hands holding their hand or around them – show the size of how tiny they are
  • Each parent holding baby
  • Family photo (use the timer or have a nurse snap one if they are able to help for a minute)

Bonus Images:

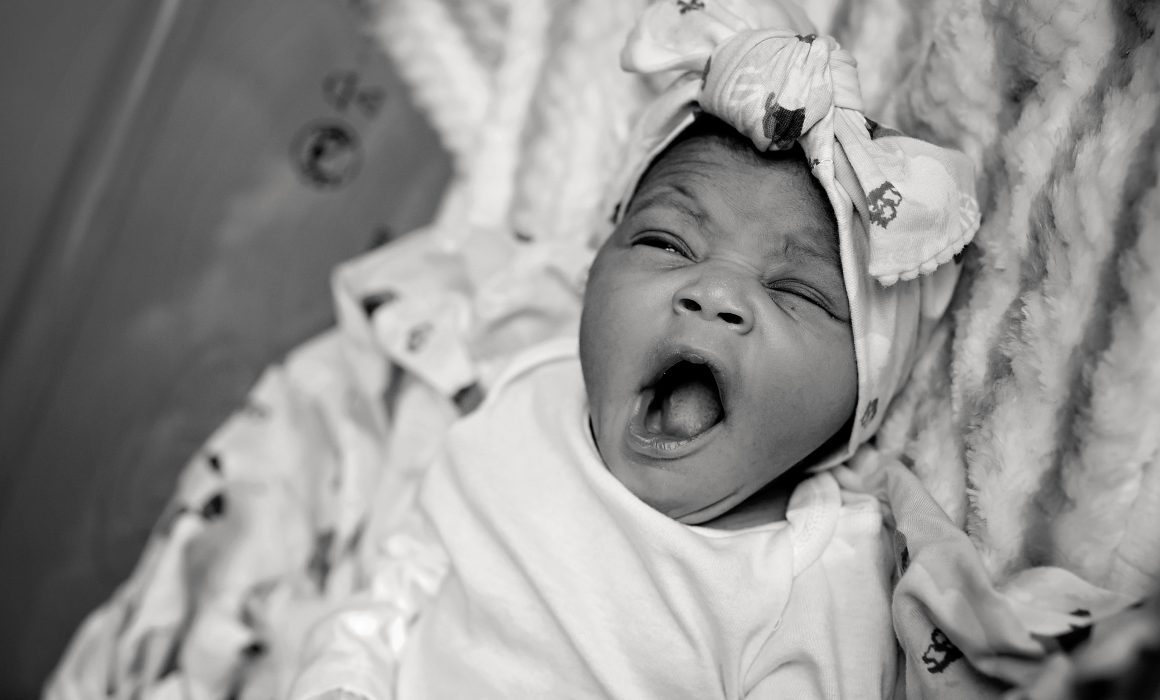
  • Yawns
  • Eyes open
  • Hair
  • Lashes / lips / ears
  • Breastfeeding
  • Sibling meeting for the first time (**I know most hospitals are not allowing siblings right now, but make sure you get this at home if nothing else)
Take your own Fresh 48 hospital photos
Things to watch out for
  • First know that all medical needs come first.  If a nurse or doctor comes in, you stop and let them do what they need to do.  Nothing you are doing can’t be done later!  I have to stop constantly during my sessions and it’s totally fine!
  • If you are removing their swaddle / hats / socks / clothing, etc watch their skin.  If they start to get a lacy veiny look they are too cold.  Always try and keep the unwrapped part short.
  • Never attempt to photograph them on their stomach or in any newborn poses.  Babies should only be held or flat on their backs unless you are trained in working with them.
  • If baby is too upset or cannot be settled or soothed, come back and try later.
Most Importantly

Take the photos no matter what.  It sounds silly and overly simplified, but I mean it.  Moments like these don’t come again.  You don’t have the option of having me or your own professional photographer come in.  Don’t miss it.  If you can’t do any of this, if you don’t have a single shot that I listed up there, but you have images you took that make your heart sing and will bring you right back to that moment?  In the end, that is what counts.

How to photograph your Fresh 48 Session